A rainy Sunday coincides nicely with a pressing need to create something with my own two hands. This quick little projects marries a few of my interests:
- Woodworking
- Music, in particular my love and patronage of the Fender Musical Instruments Corp., one of America’s most brilliant innovators.
- and finally, painting
Admittedly the woodworking and painting are going to be as basic as possible to conceive and complete this in one day. Another key point is to use all materials at hand. I should have enough of the raw materials, art supplies and tools needed to avoid running out and buying more. Friday night at a rehearsal I consulted with a guitar expert about why the intonation of my Stratocaster is wildly unstable. This lead to ordering parts from Fender direct the next morning. So, a weekend of all things Fender.
Look at Pinterest and Etsy; you’ll see lots of examples of what I’m envisioning here. A few goals:
- Keep it simple
By that I mean distressed, rough edges. Avoid the fussiness that sometimes creeps into my paintings. Okay, always creeps in. - Be faithful to the logo. The lawyers may come after me, but fortunately I can draw free-hand.
- Execute what I see in my mind. My vision is red white and blue background to emphasize America. Fender’s best instruments are the American Series, even though in this age of austerity I am started to toy with buying second-hand made in Mexico products. Avoid the urge to Photoshop a mockup. The point is to use my hands to make something from nothing.
Step 1:
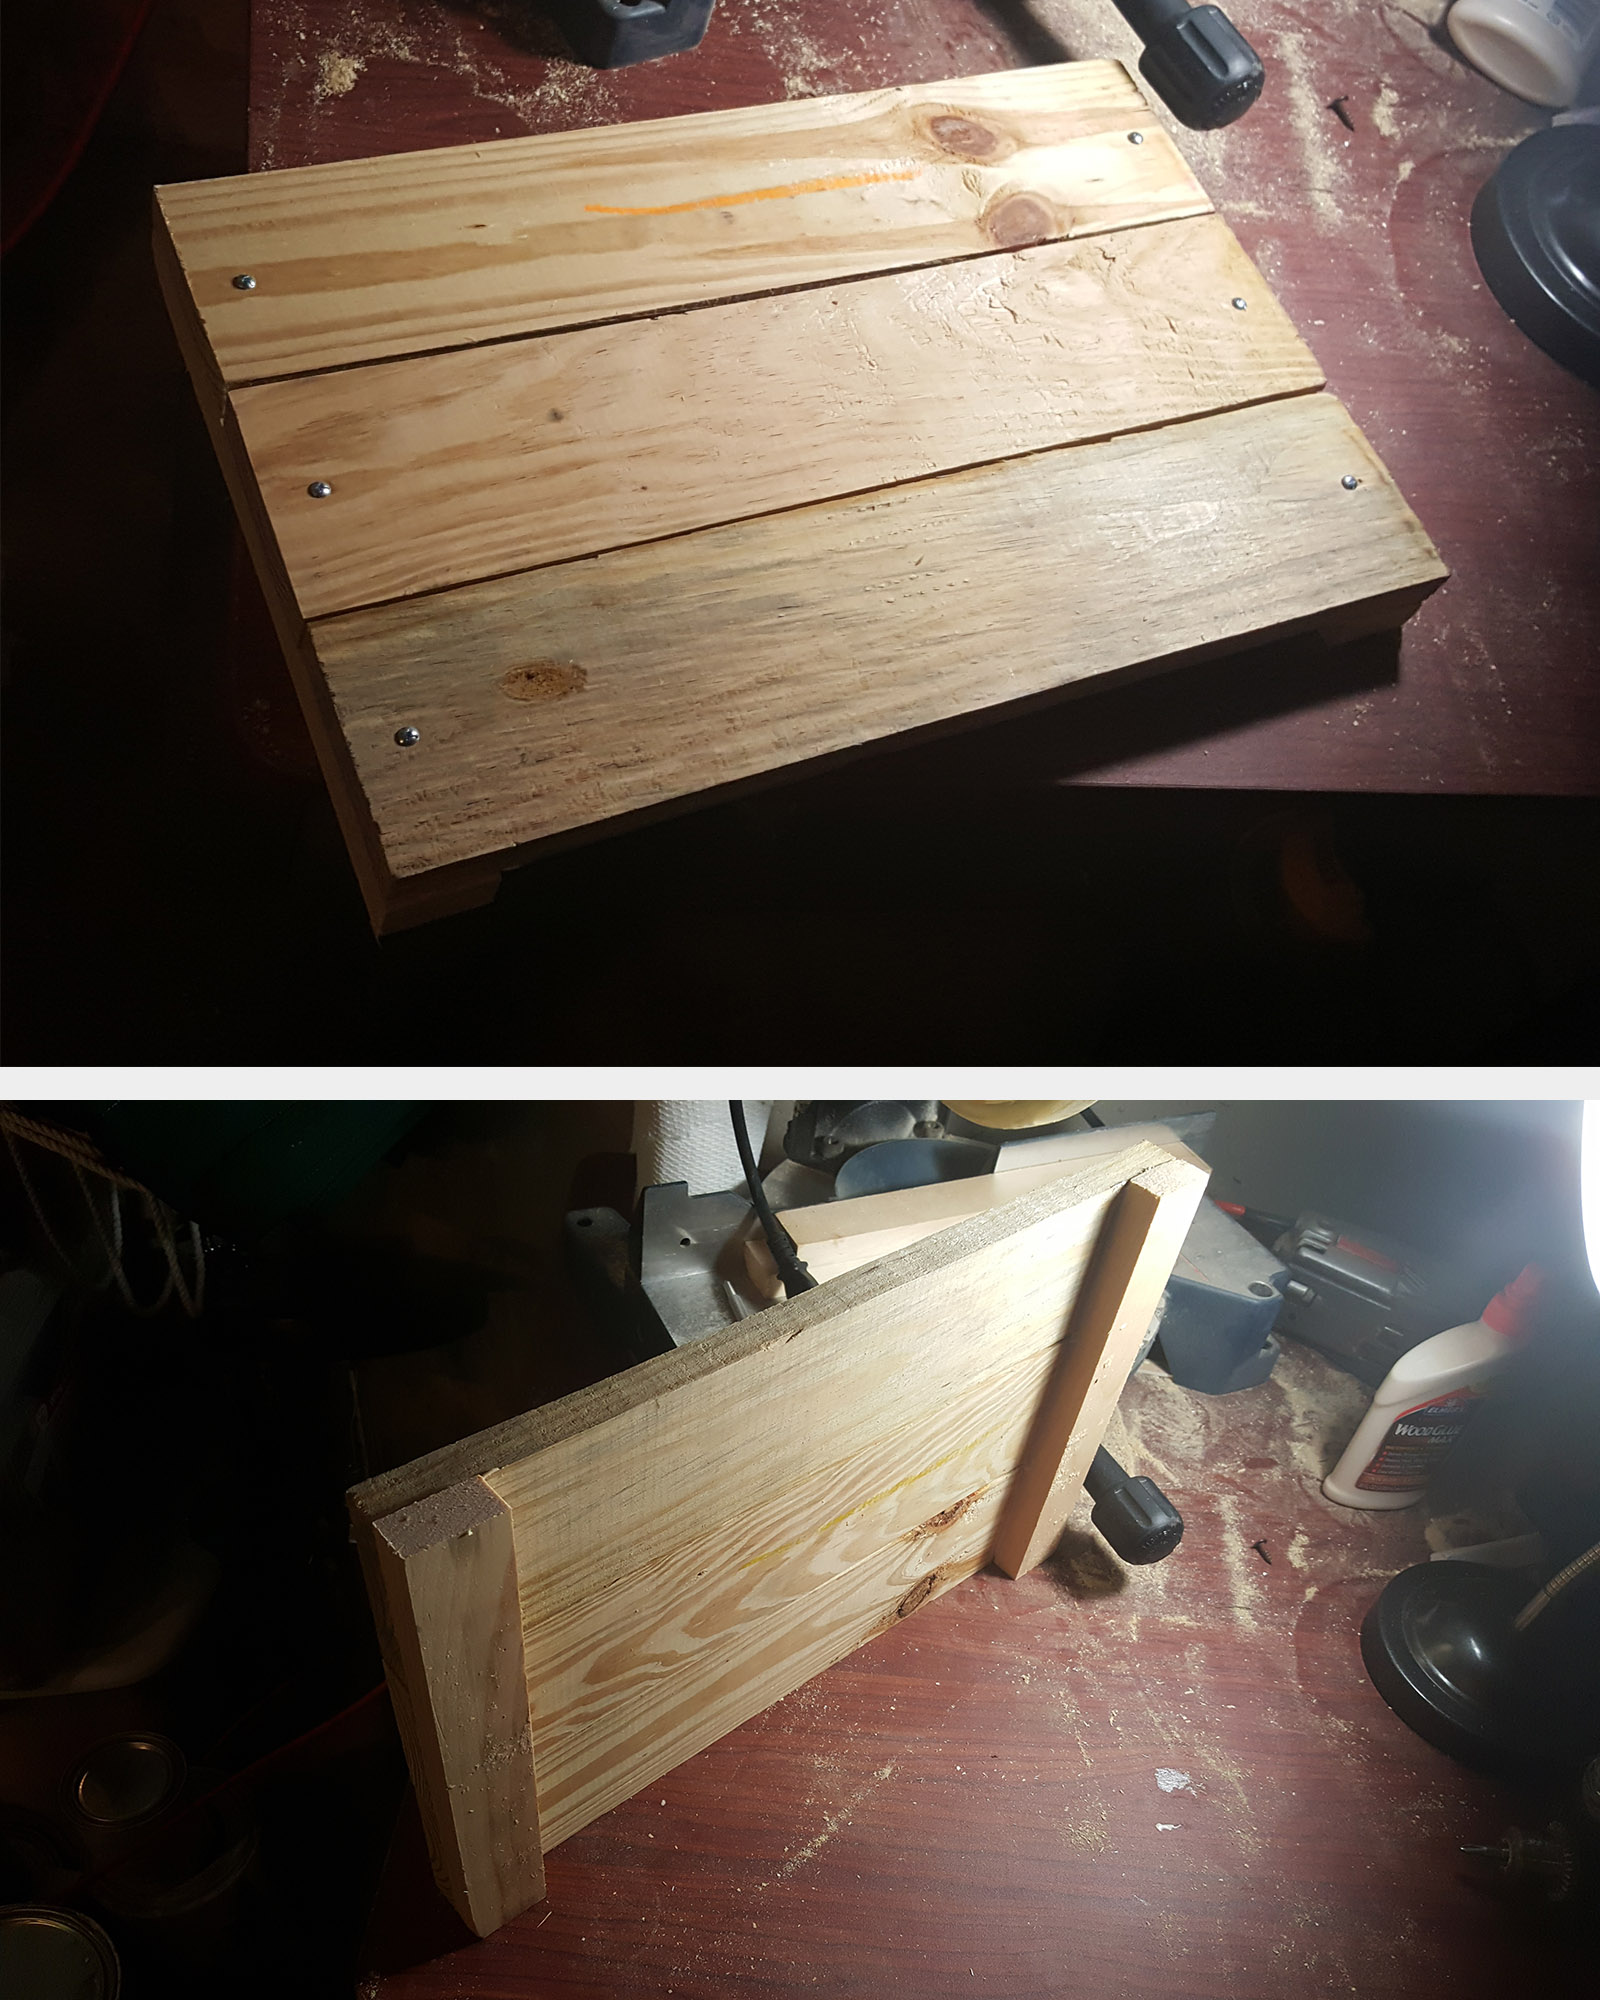
I wanted the final piece to be about 11″x17″. Modestly-sized. Using a mitre saw, I cut 17″ lengths from spare deck boards in the garage. These are pressure-treated so they are more costly than what I’ll use going forward. There’s a big trend in reclaimed pallet wood, but recall I wanted to stay put and use materials on hand. I recently found myself moving these boards “out of the way”. This means they were “in the way”.
I know I wanted a gap, to allow some imperfection. I didn’t use my corner clamps which were given to me by my brother decades ago when he saw a canvas I stretched wasn’t “true” (he’s a machinist and skilled craftsmen). I’ll transition to that level of finesse when I setup my workshop. they are braced in the back by scrap 1″ x 1″.
Step 2:
Acrylic gesso, which is always laying around was quickly brushed in. Painting directly on the wood surface simply isn’t going to work. I intentionally scrubbed it in
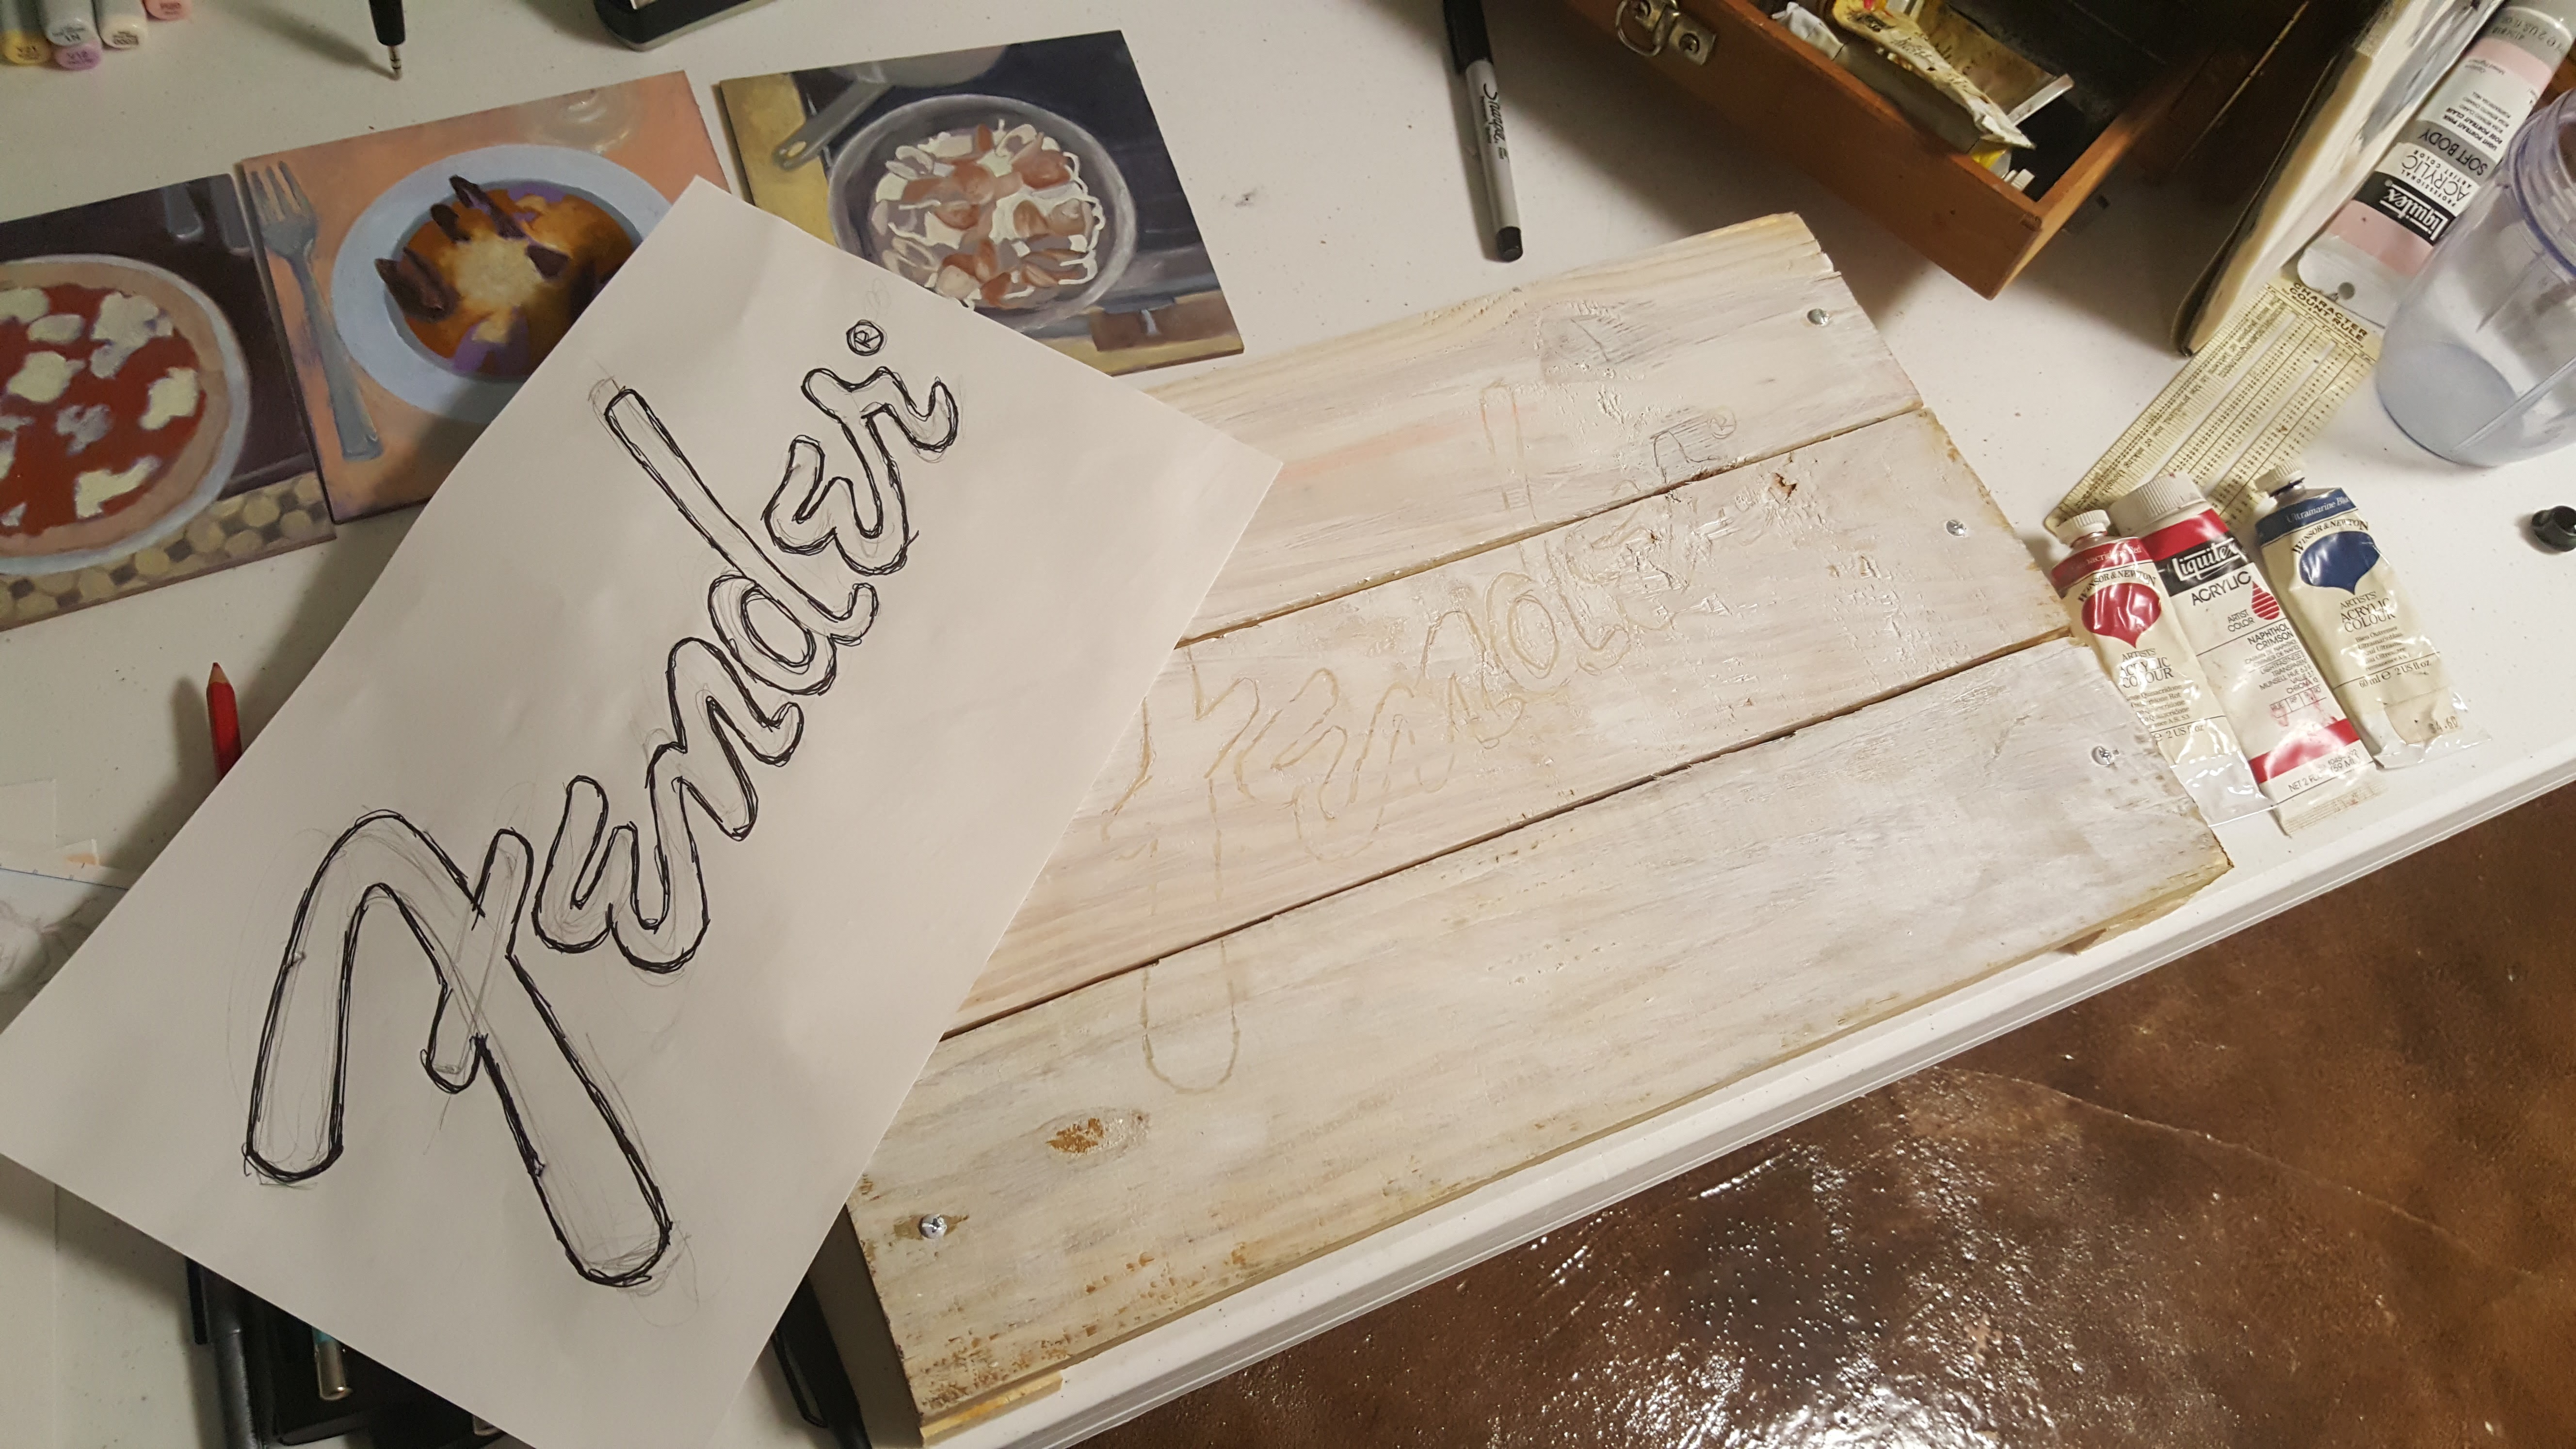
quickly to allow wood to peak through. I transferred the logo sketch by simply placing it in the not-yet-dry gesso to score a reference shape. In fact, on a humid day the drying time of gesso is terribly slow, likely the reason I’m blogging. Like waiting for paint to dry. Literally.
Step 3:
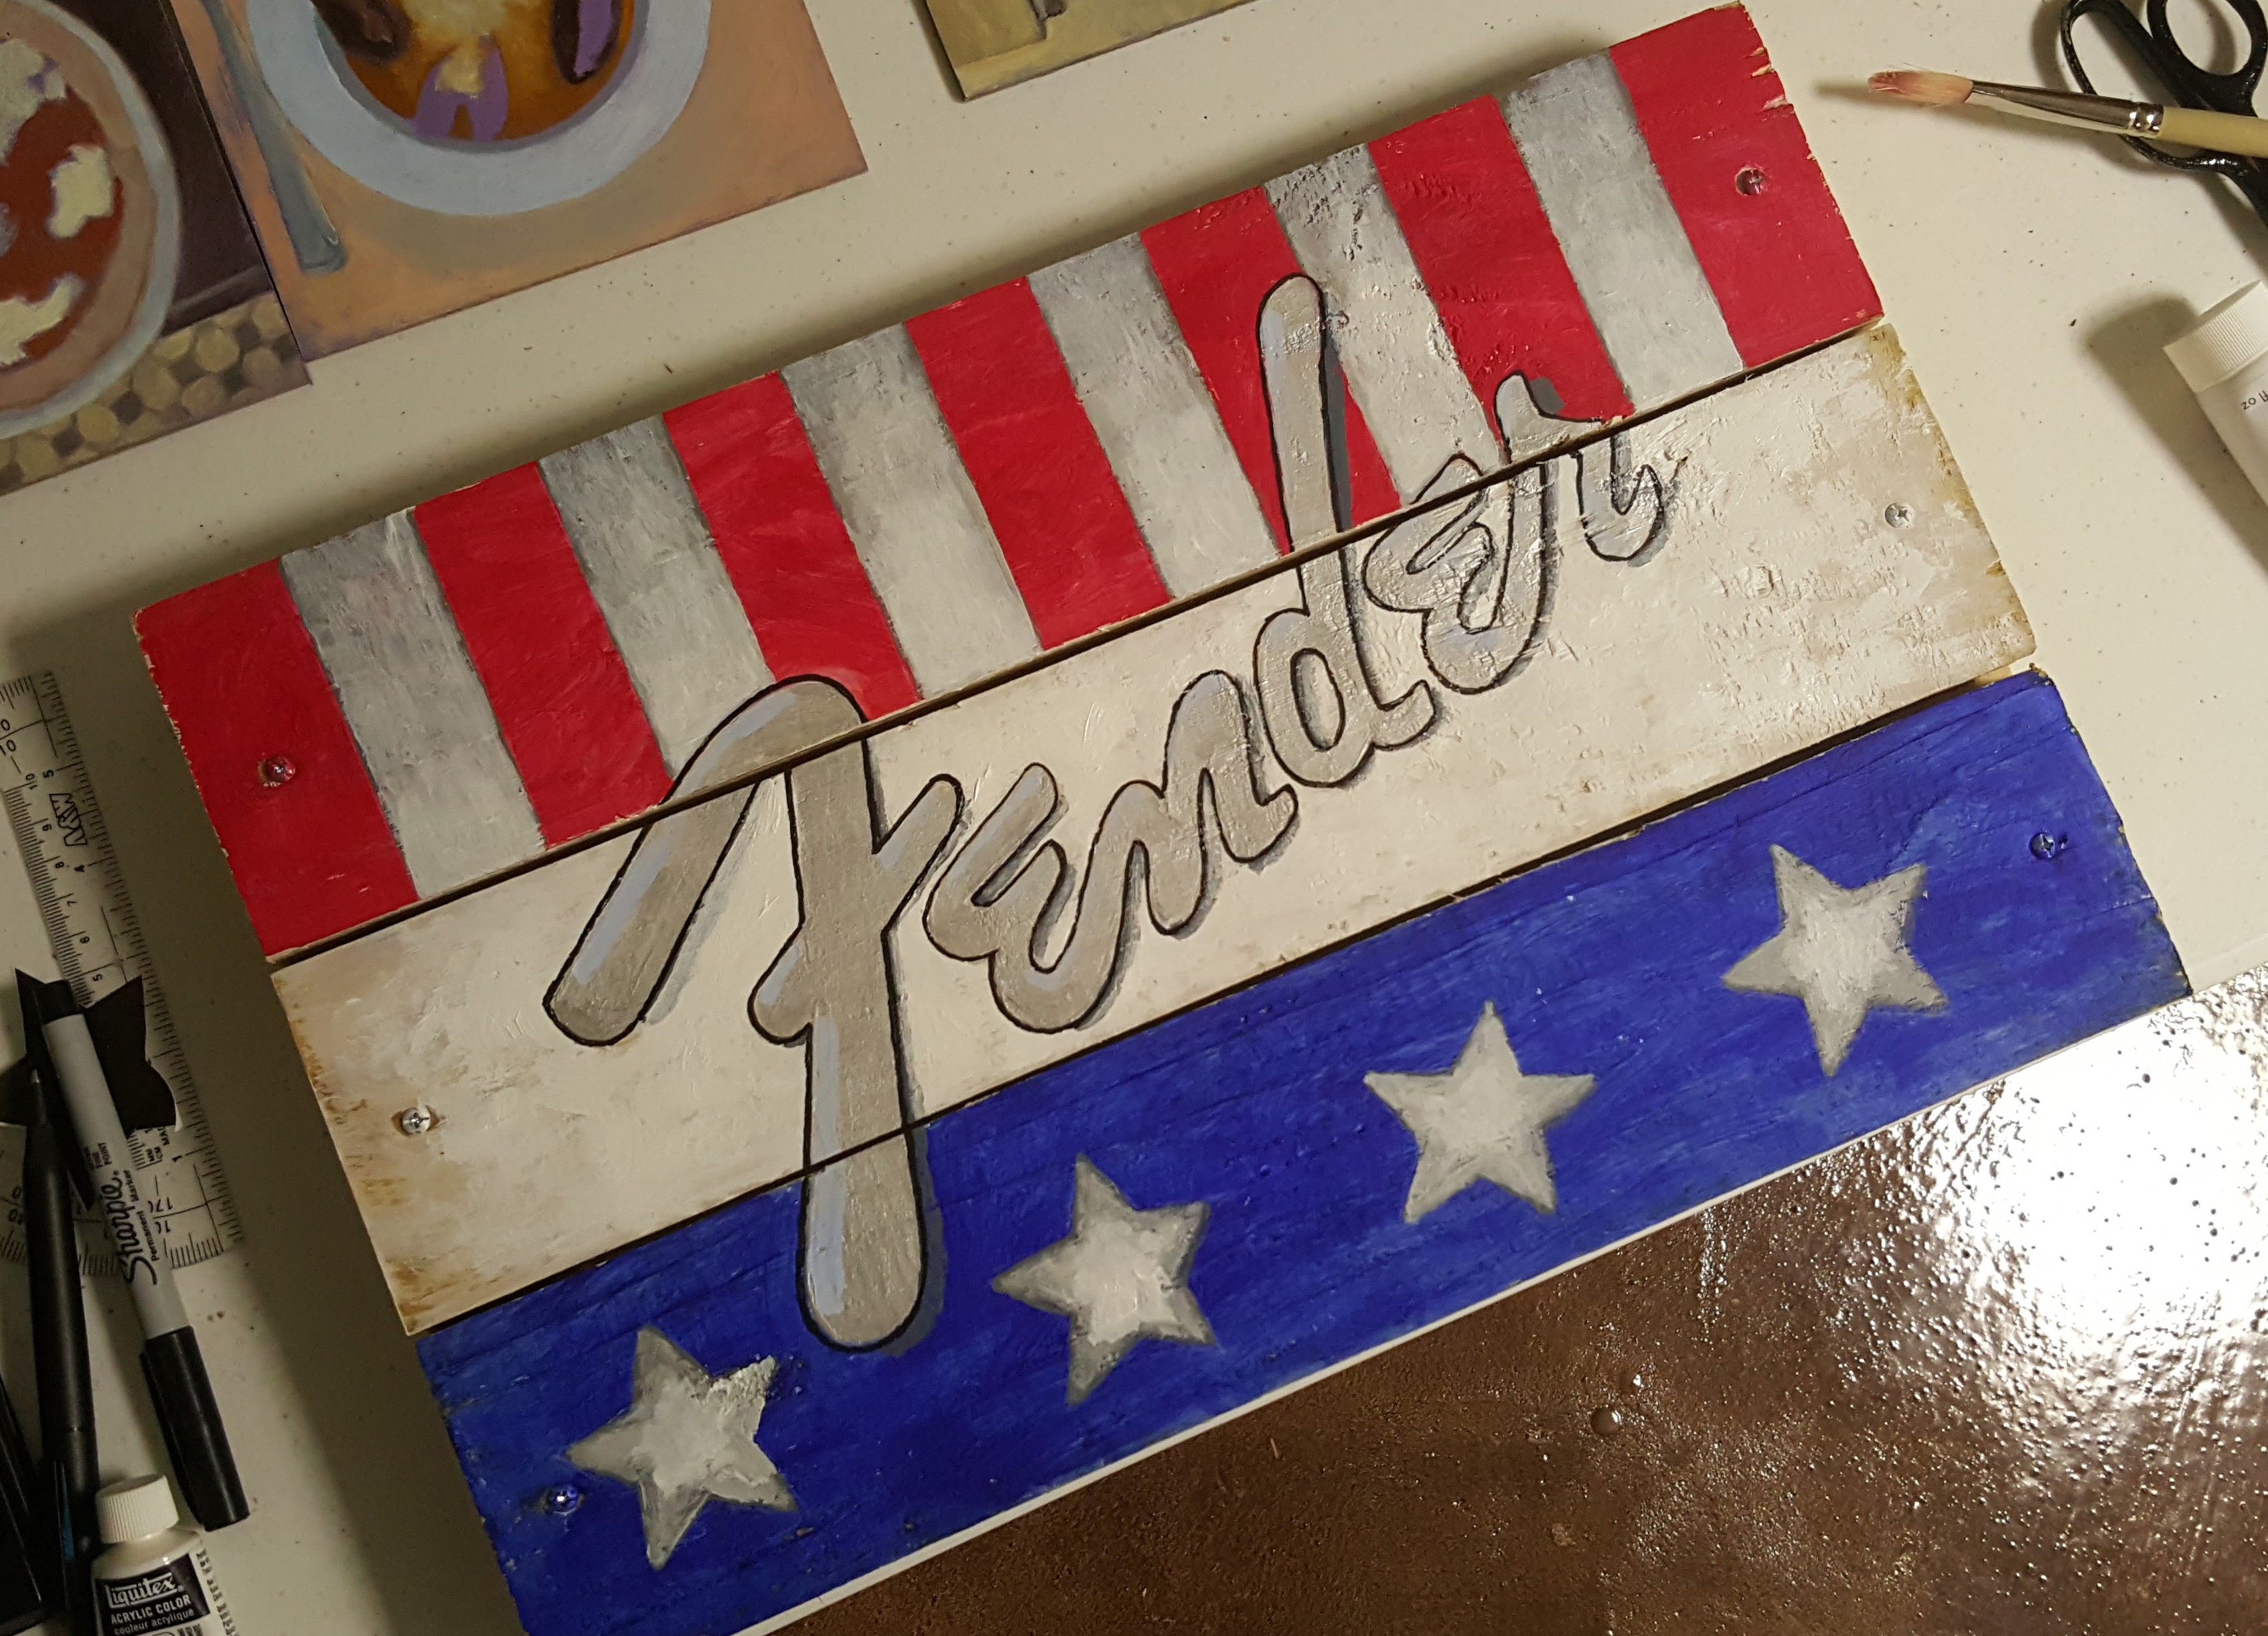
Laying down the initial areas of color, it occurred to me to be too reminiscent with the flag of France and not American enough. Nothing against France (we may retire there) but it isn’t relevant to my Fender MIA (Made in America) tribute. It looks like I needed to add stars and stripes.
Step 4:
After a few hours of work, I thought it was done. Something was not quite right, and I couldn’t put my finger on it so
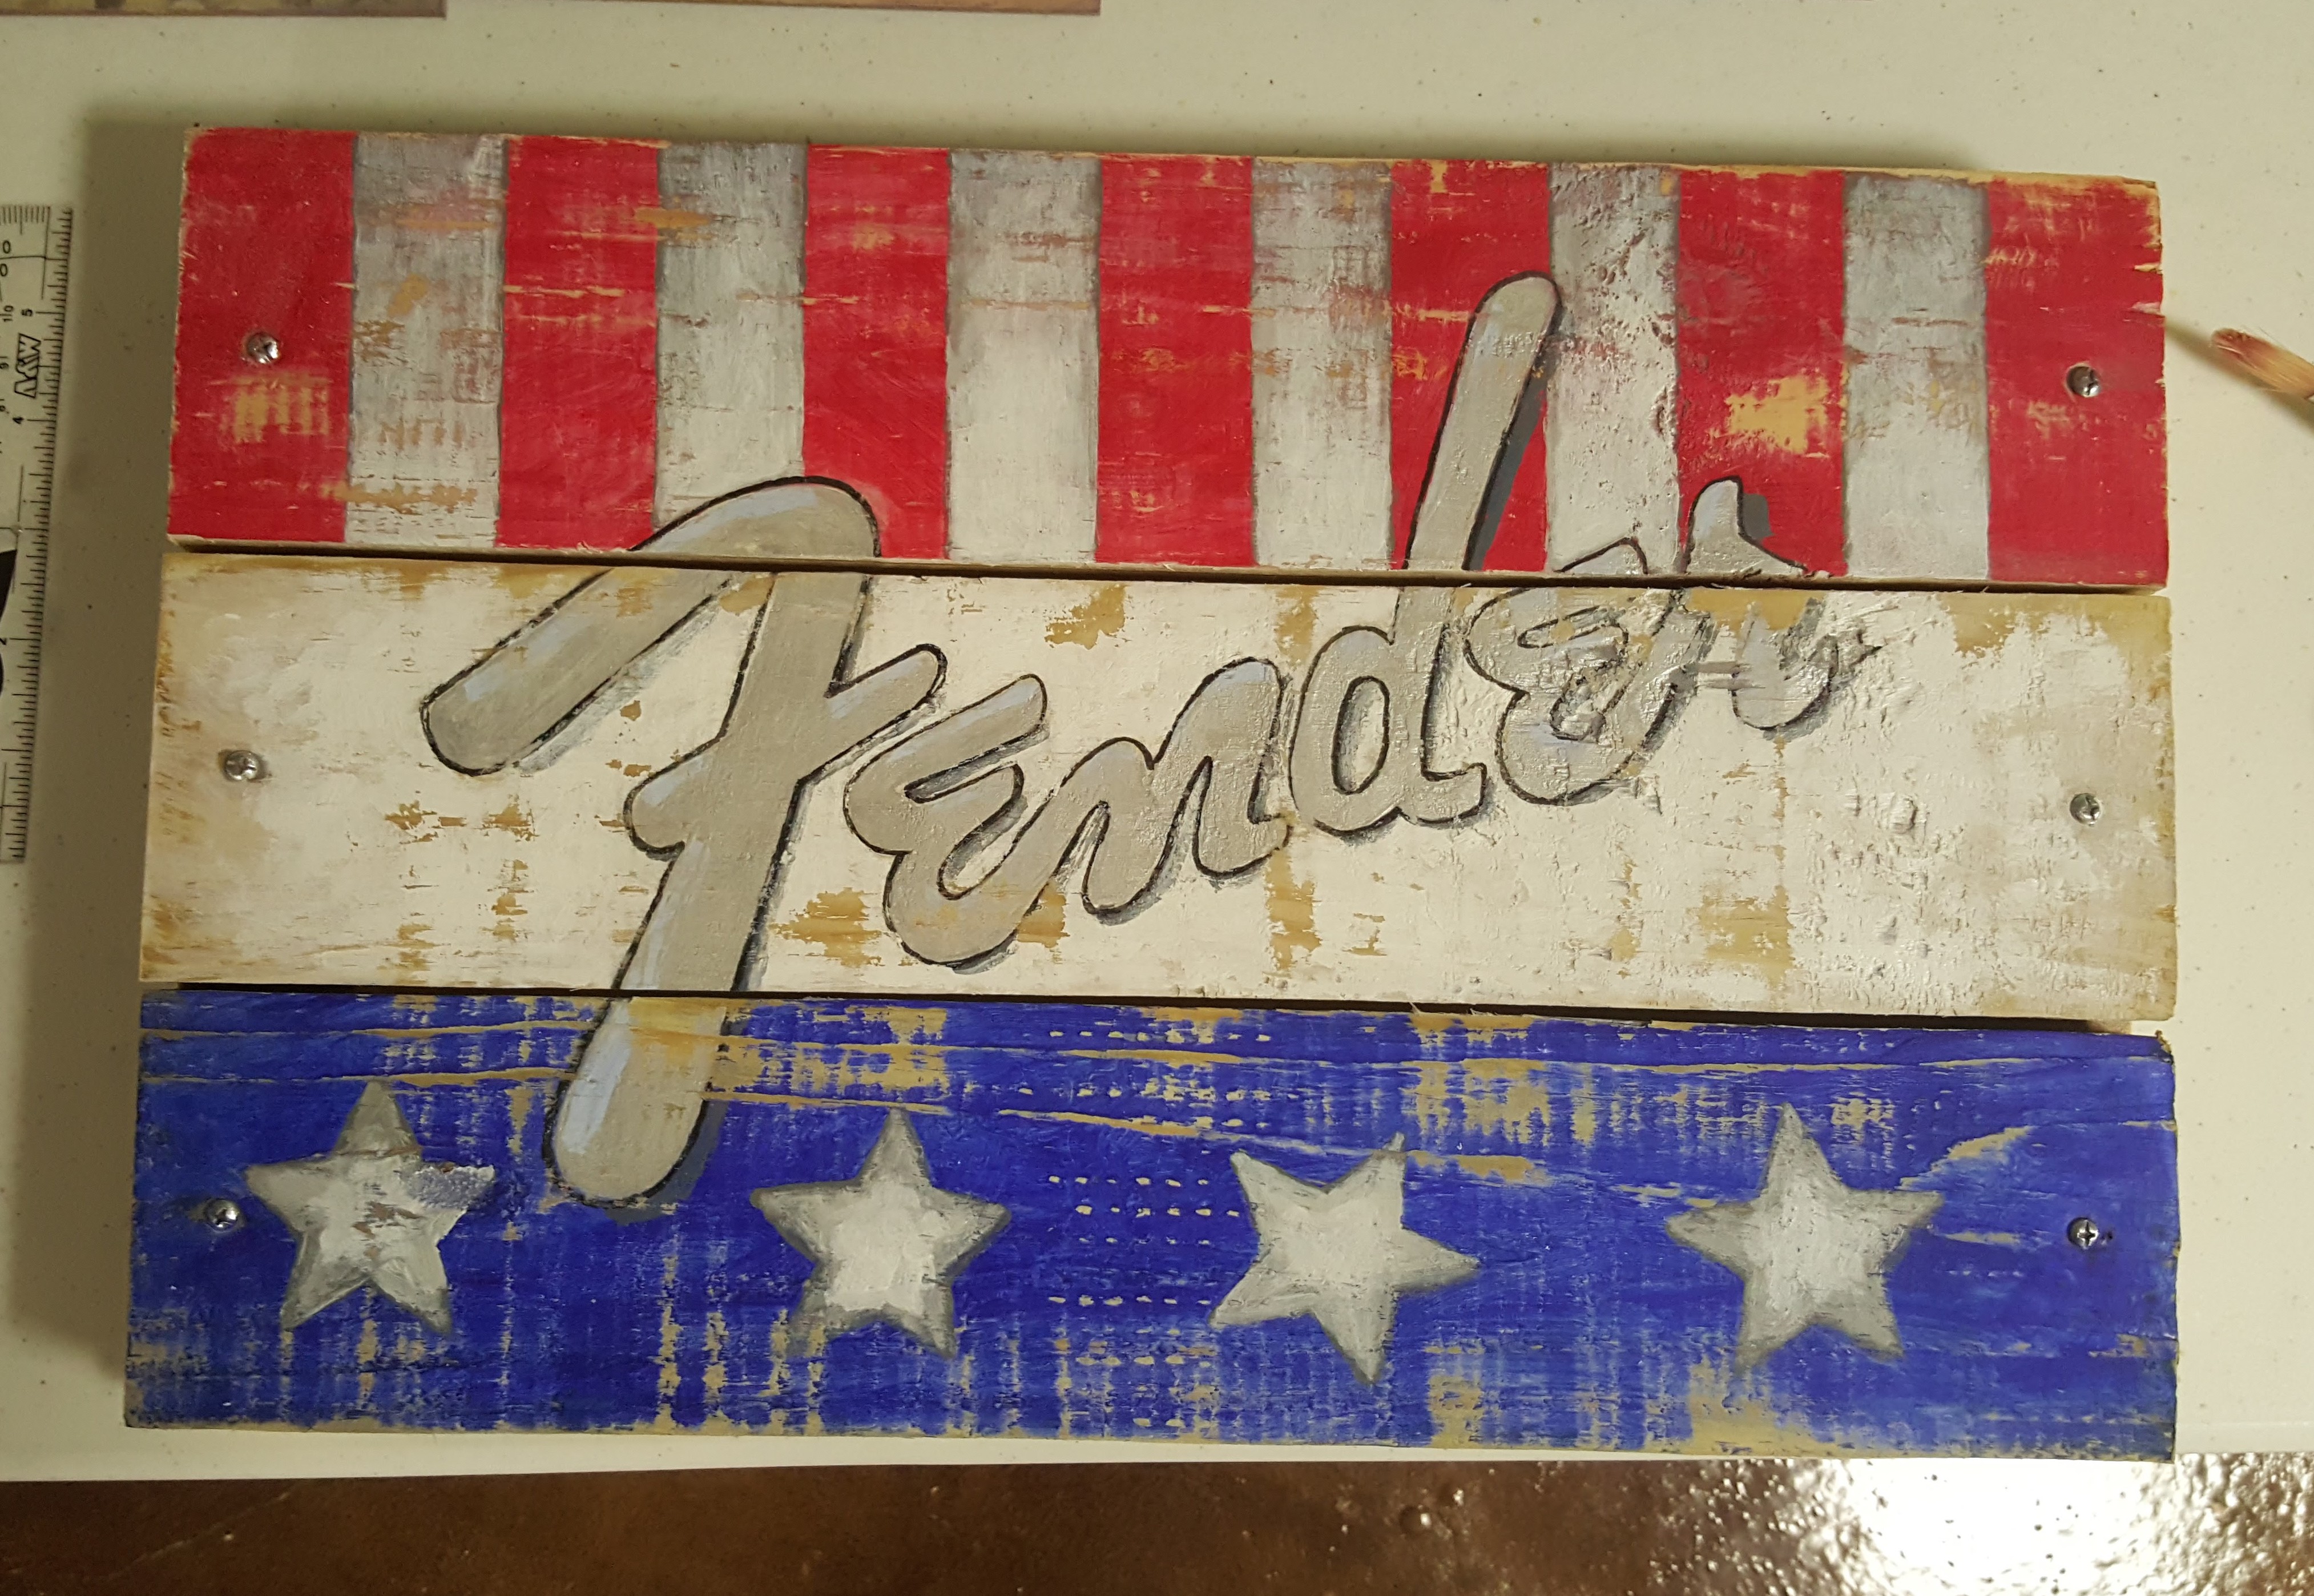
it was time to take a break and look at Pinterest boards. The problem was that it wasn’t perfect, but it was trying to be… I meant all along for it to look distressed. So, I took a deep breath and trotted out the electric sander to irreversibly mess it up somewhat.
Thanks for reading, if you have any questions please feel free to comment.