I have had aspirations of getting into woodworking for the longest time, and the time is upon me! This is partly owing to nearly forty years of making decorative visual arts and the nagging feeling that I’d like to branch into “creating something from nothing… that is useful“.
Inspiration
Here is my first outing. A drink stand, if that’s even a thing. As I was sitting on my balcony (another work-in-progress post for another time), I realized I had nothing to put my drink on. I set out to be “inspired” by some existing ready-to-be-assembled designs and found this one online . It seemed an achievable first outing.
I knew my surface would be a pop of color, probably a reddish-earth terra cotta, which I found at Home Depot for the under $2USD. I didn’t look at the palette for the balcony design (yes I have one. Check it out on Pinterest), but I know neutrals and grays will work with this.
The Drawing Board
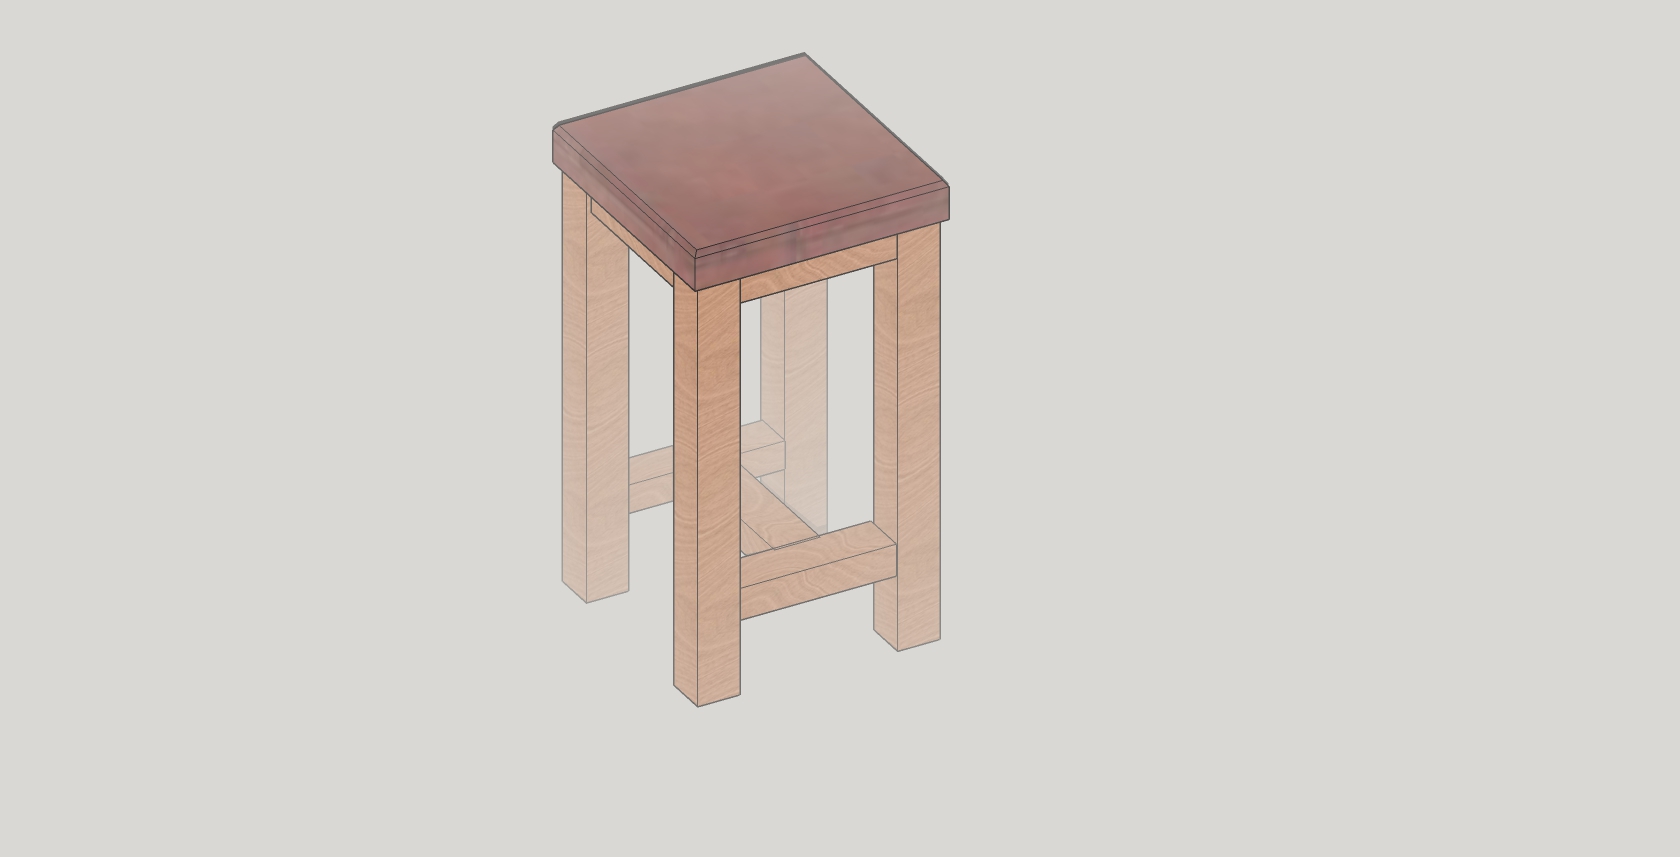
Maybe because I’m a glutton for punishment, I thought I should mock-up the plans in SketchUp. At the very least I could establish my own measurements. I haven’t looked at that app in years, it is apparently no longer a Google product but that doesn’t change what I want more than anything is at least an hour or two of professional SketchUp training. I digress.
First Cuts
 As you see from the picture, these cuts are pretty basic. What I was going for was completing this piece in one day, I have since relaxed my ambitions to the extent that if it takes two days or spans two weekends, it’s better to do it right. As Teddy Roosevelt said “anything worth doing is worth doing well”.
 Assembling the Base
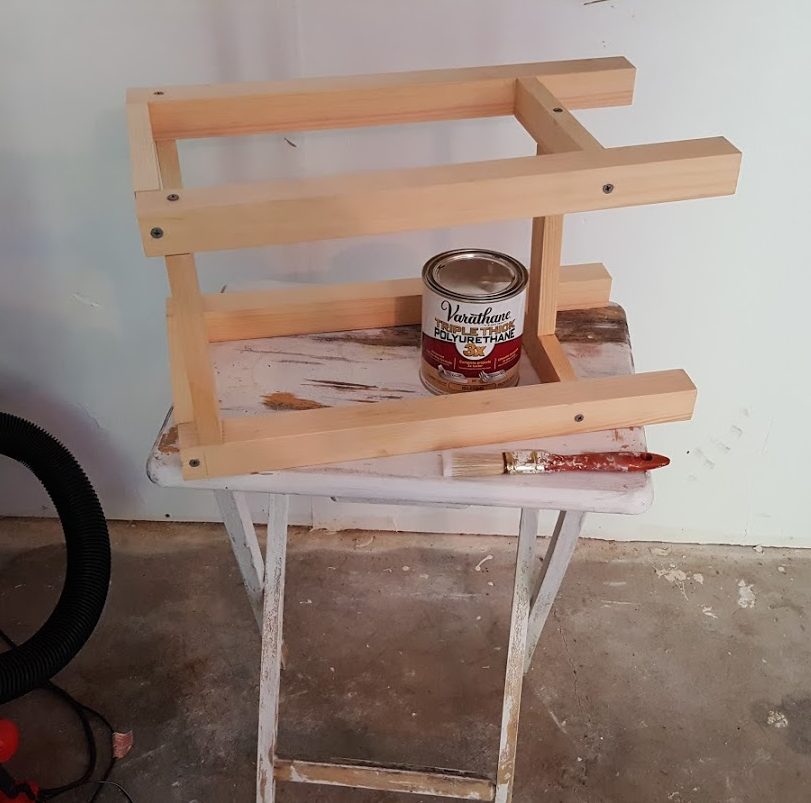
I far underestimated the number of 1×1″ pine boards I would need. That’s a lie, I didn’t do the math at all, even with an app, because, well: math. I used a few smaller boards for the inner “I” bracing left over. I used wood screws and will graduate to counter-sink and hide the screw heads as time goes on. I went with an interior polyurethane I had laying around, even though this piece will be outdoors most of the time. So I’ll haul it in when inclement weather returns, or chalk it up to experience.
Finale
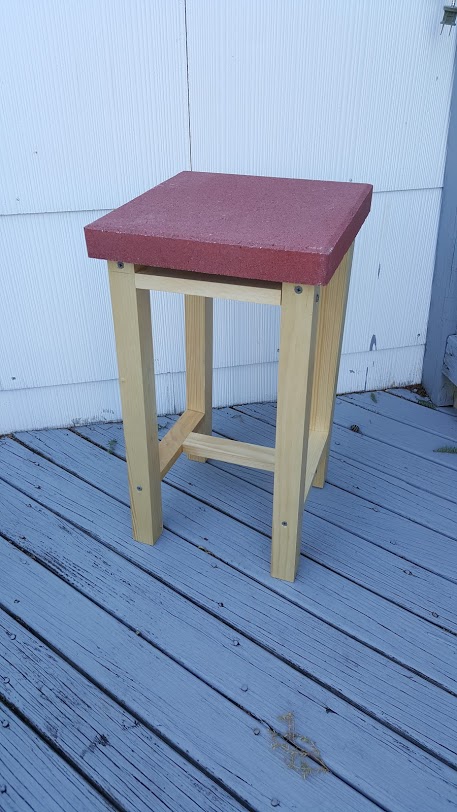 I added the heavy paver stone and adhered it with Gorilla Glue and let it set overnight. Didn’t see a need for clamps due to the weight of the stone top. First time using this product so time will tell if it’s up to the task of gluing stone to wood. If I had to do it all over again I would have used my corner clamps to make sure the I beam bracing in the bottom was squared-off all around. There truly are no shortcuts to doing a quality job.
While I may have spent 30 or 40 years learning how to make a painting in one day, woodworking is a whole new medium. As with anything, practice makes perfect.
So at last, here it is in place.
And the drink stand in action. That’s right, I spilled wine on it with the inaugural use. I knew I would. The social media debut of my first useful piece :