Inspiration
Clutter. I can’t tolerate it. In my opinion nothing is more detrimental to the creative process than an untidy workspace. As James Brown said “Papa Don’t Take No Mess”.
I’ve been troubled lately that my guitars are all over the house. Some of them are where they belong, in the musical man cave where I spent a lot of free time. Some are in cases, some are in those singular ugly stands from music supply stores. Let’s organize my guitars for easy access, just like my tools!
I have seen a couple of plans, and the one that grabs me the most is a little beyond my current abilities and would be easier with the right tools. As I’m a power hand tool user, I thought that for this effort I should concentrate on using my corner clamps, which was a shortcut I took for my drink stand.
First Step: Assembling the Base
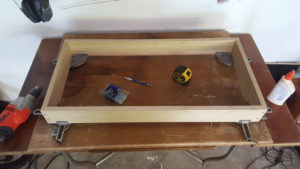
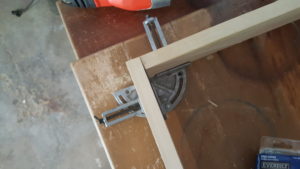
 Another portion of this outing is the choice of poplar. While pine would likely be softer, I wanted to venture into a different density of wood, like trying new canvas or paper for visual artists. Here is the assembled base with a closeup of the clamps.
 You really need these if you are going to get into woodworking. Mine were a gift from my brother when he saw a stretched canvas that wasn’t “true”, but if lost or stolen I’d buy them again in a heartbeat. Required!
Assembling the Two Parts

After a few hours of basic carpentry, the stand is functionally done. The next steps are ornamental, some might say optional – but I’ve already taken a few shortcuts – I feel compelled to add the suggested felt fabric in spots (most plans online call for carpet) and likely a quick coat of polyurethane. Not seeing a need to add stain, I want to bring this into use sooner rather than later.
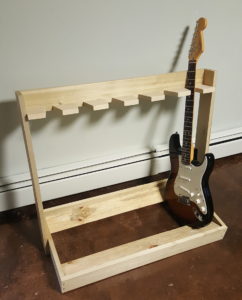
The Fender Strat seems to like its new home pictured, but the first real wrinkle reared its head when my Fender Precision Bass was touching the floor in the cradle. Will have to improvise “feet” or find some ready-made on the shelves. I went with additional felt to cradle the instruments against the epoxy cement floor finish.
Lessons Learned
Not really a new lesson, but a recurring theme: these things take time! I rushed to synchronize the rare arrival of my new addition. There are plenty of rough edges and I could have put another week of finesse into this. Also, perhaps oil-based finish is the way to go. Even though water-based is easier to clean up, I used four coats of polyurethane and it is only a hint of the polish I wanted.
Finale

If you’ve arrived here from Search and are interested in trying this, feel free to ask any questions. The point is that if I could do it, anyone can – but you should have at least the basic power tools. Below is a list of online plans from which I drew inspiration. My goal was to finish it in time for the arrival of the new addition to my arsenal (I hate to say “collection”, that implies I don’t play. I do.)
Here’s a list of inspiration:
- DIY: Make a Boomerang Guitar Stand
- Eledar.net: The plan I mostly used
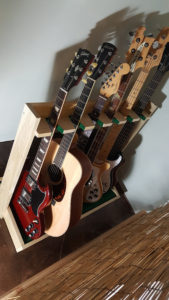
It’s already full, so I will try another when I get another six guitars!
Please leave any comments below. Thanks for reading.